
First-time setup
Read this if you administer a fresh Flezise deployment. It assumes the stack is up (see Kubernetes with Helm) and takes you to the point where a team can create its first project.
Prerequisites
- The app is reachable in a browser and sign-in works. The default administrator is
admin@sdlc.localwith the passwordChangeMe123!unless your deployment setDEFAULT_ADMIN_EMAIL/DEFAULT_ADMIN_PASSWORD. Change it after you sign in. - An API key for at least one model provider, or a subscription you can sign in to (Claude, OpenAI Codex, GitHub Copilot and others).
- The list of people who need access, and which of them may create projects.
1. Connect a model provider
Open Settings (the gear in the sidebar). The scope switcher at the top of the settings navigation reads Platform; everything on this page happens at that scope. The first tab, AI Gateway → Providers, is where every model request in the workspace is routed.
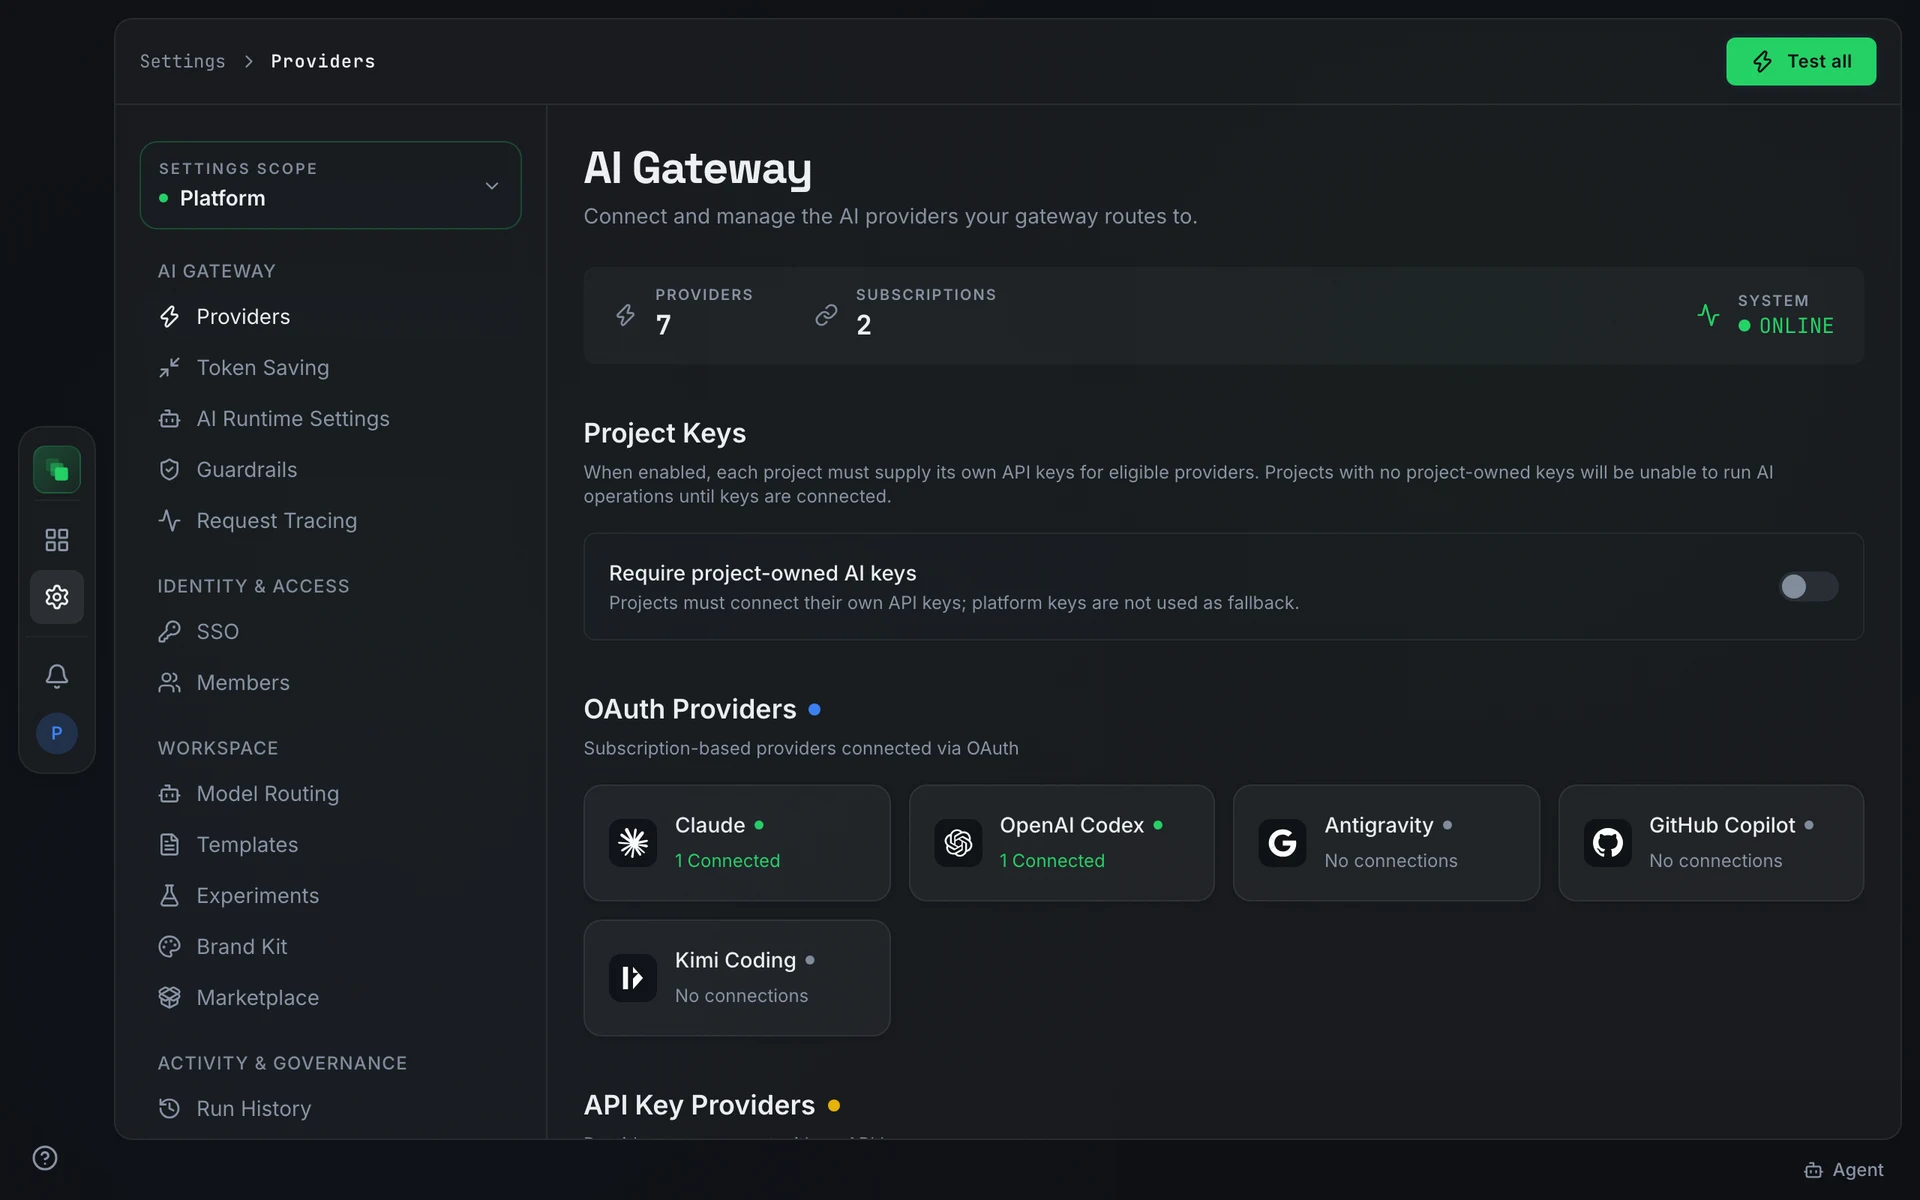
There are two kinds of provider. Subscription providers (Claude, OpenAI Codex, Antigravity, GitHub Copilot, Kimi Coding) connect through a sign-in flow. API-key providers (OpenAI, Anthropic, Google Gemini, Azure OpenAI, AWS Bedrock, Groq, Mistral and the rest) open a side sheet with a single API key field. Paste the key and save; the sheet shows the provider as Routed via AI Gateway with its routing prefix. Test all in the header checks every connected provider at once.
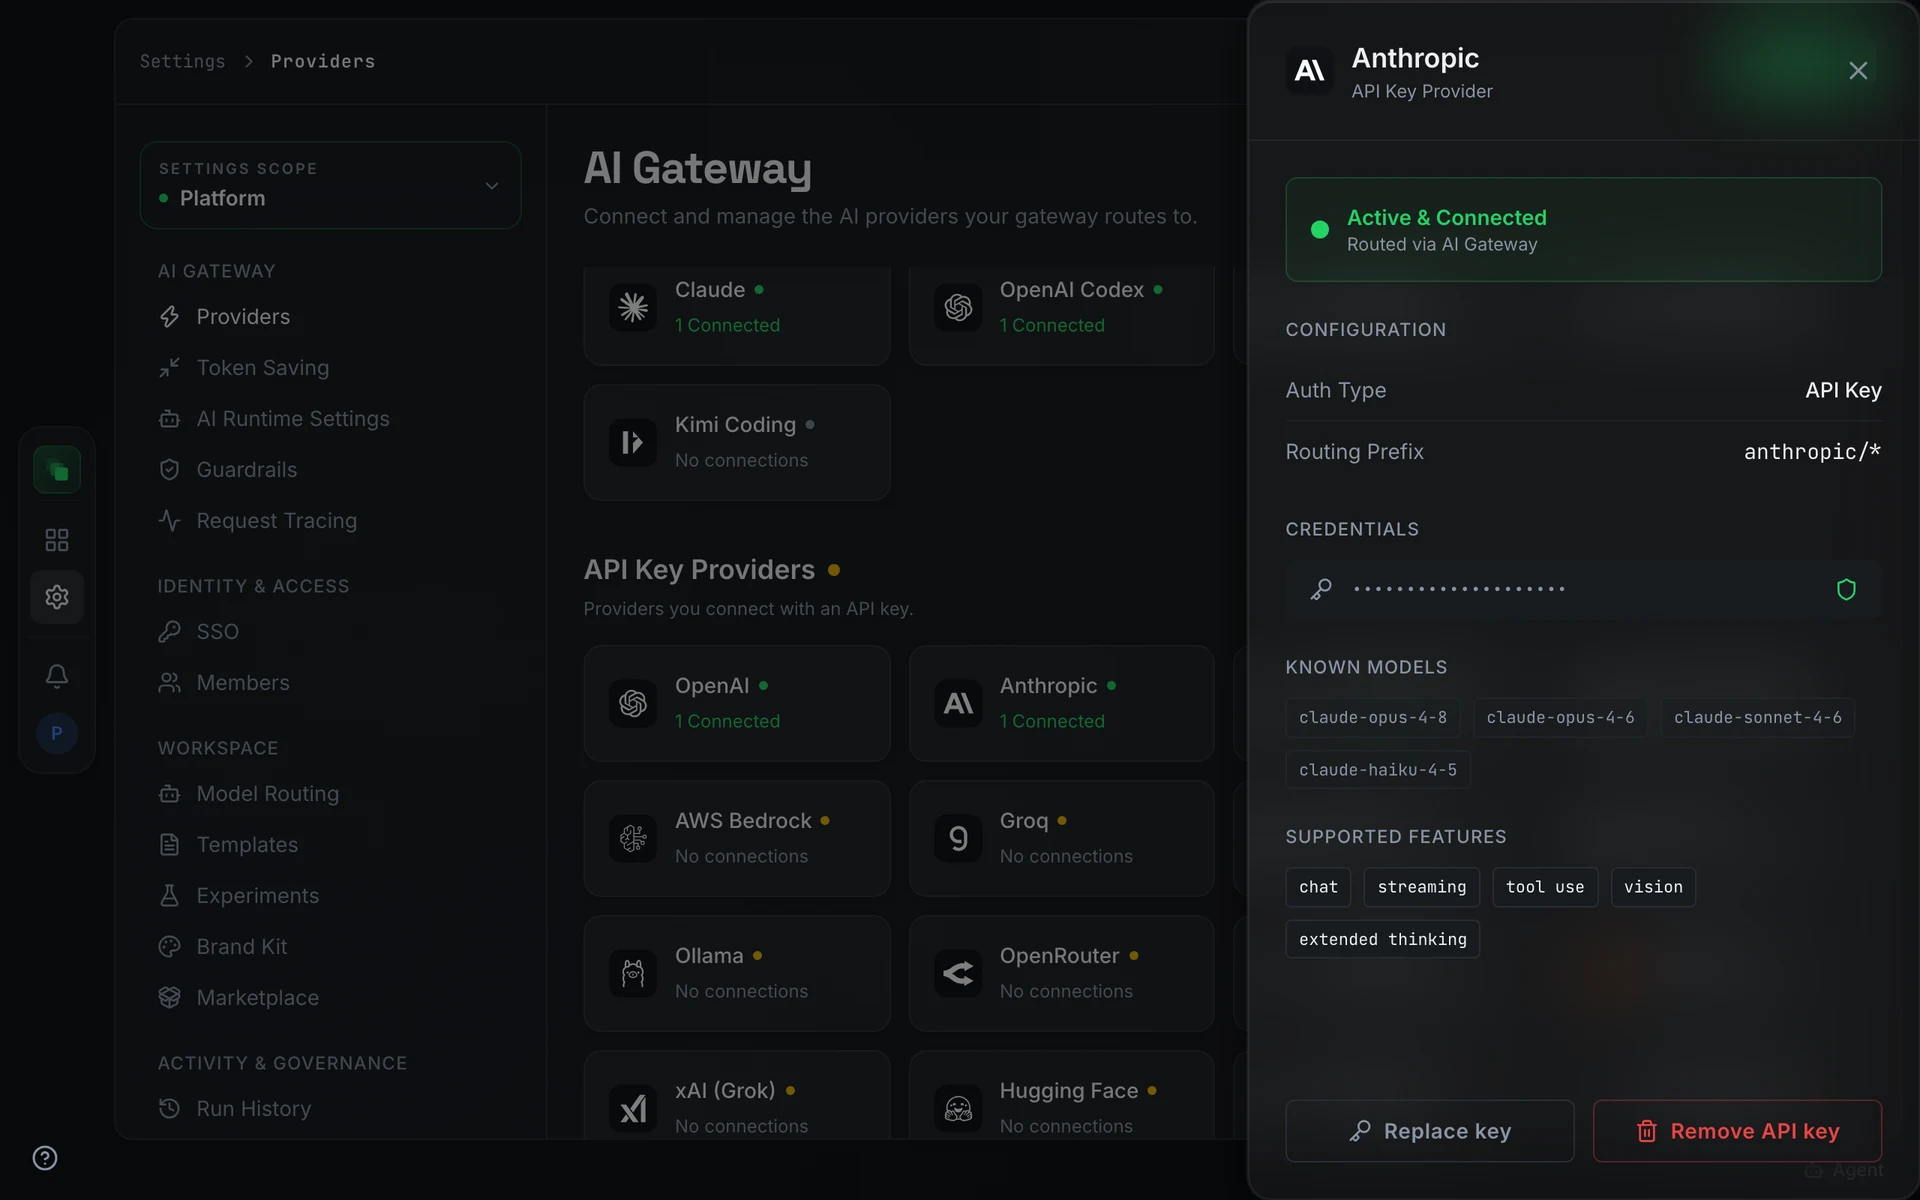
Keys stay in the gateway. Projects can be required to bring their own: the Project Keys section holds the Require project-owned AI keys toggle, which stops projects without their own keys from running any AI operation. Leave it off until you need it.
2. Route models to work
Settings → Workspace → Model Routing decides which model handles each kind of work: heavy thinking, artifact review, standard work, chat and so on. Each role has a default model and a reasoning variant, and only providers you connected in step 1 appear in the pickers. The defaults are sensible; change a role when you have a reason, then Save.
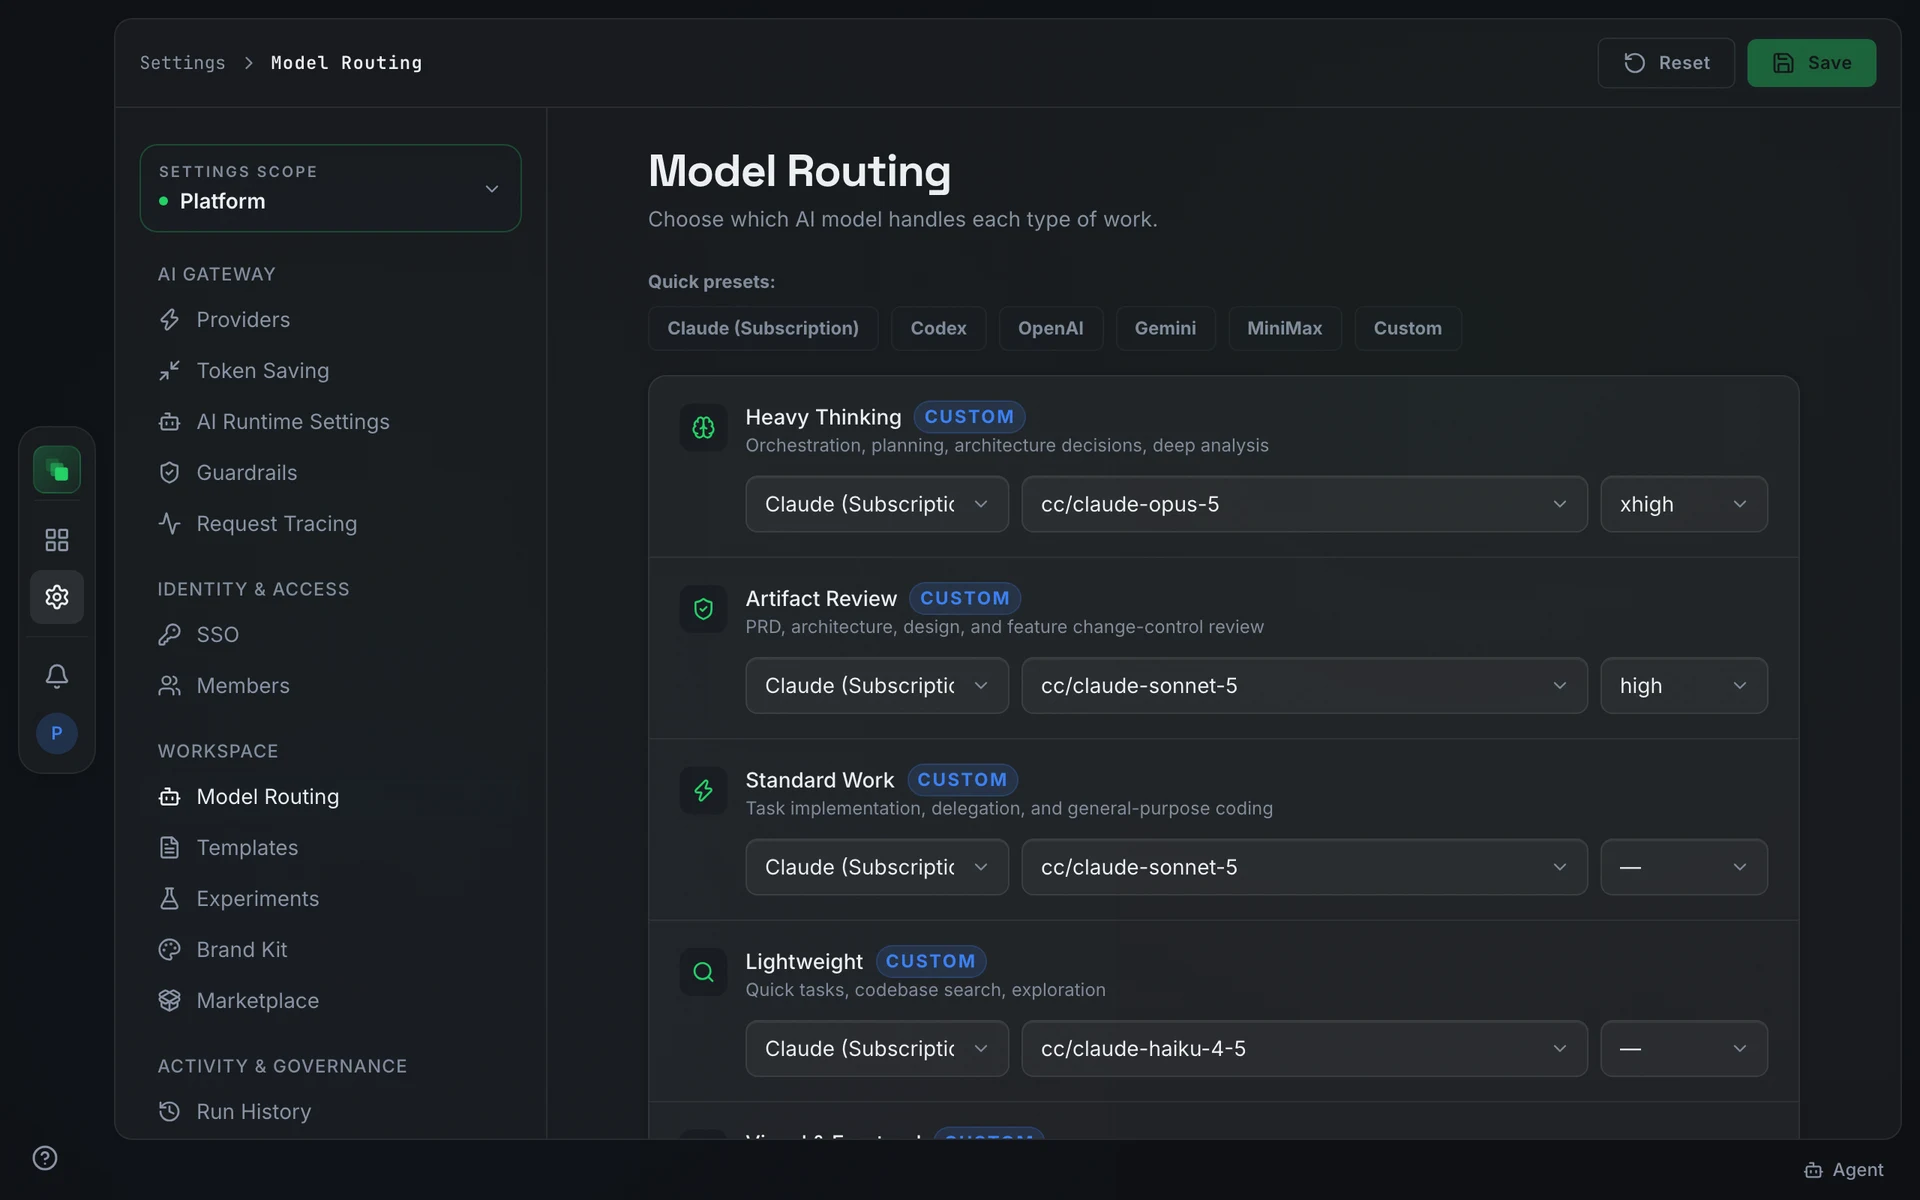
Projects inherit this routing and can override it under their own Settings → Model Routing.
3. Invite people
Settings → Identity & access → Members lists everyone with platform access. Invite people asks for an email and a role (Member or Administrator) plus the Can create projects checkbox, which also makes new projects add that person as a Project Admin. Optionally assign projects now with a group per project; the default is Project Member.
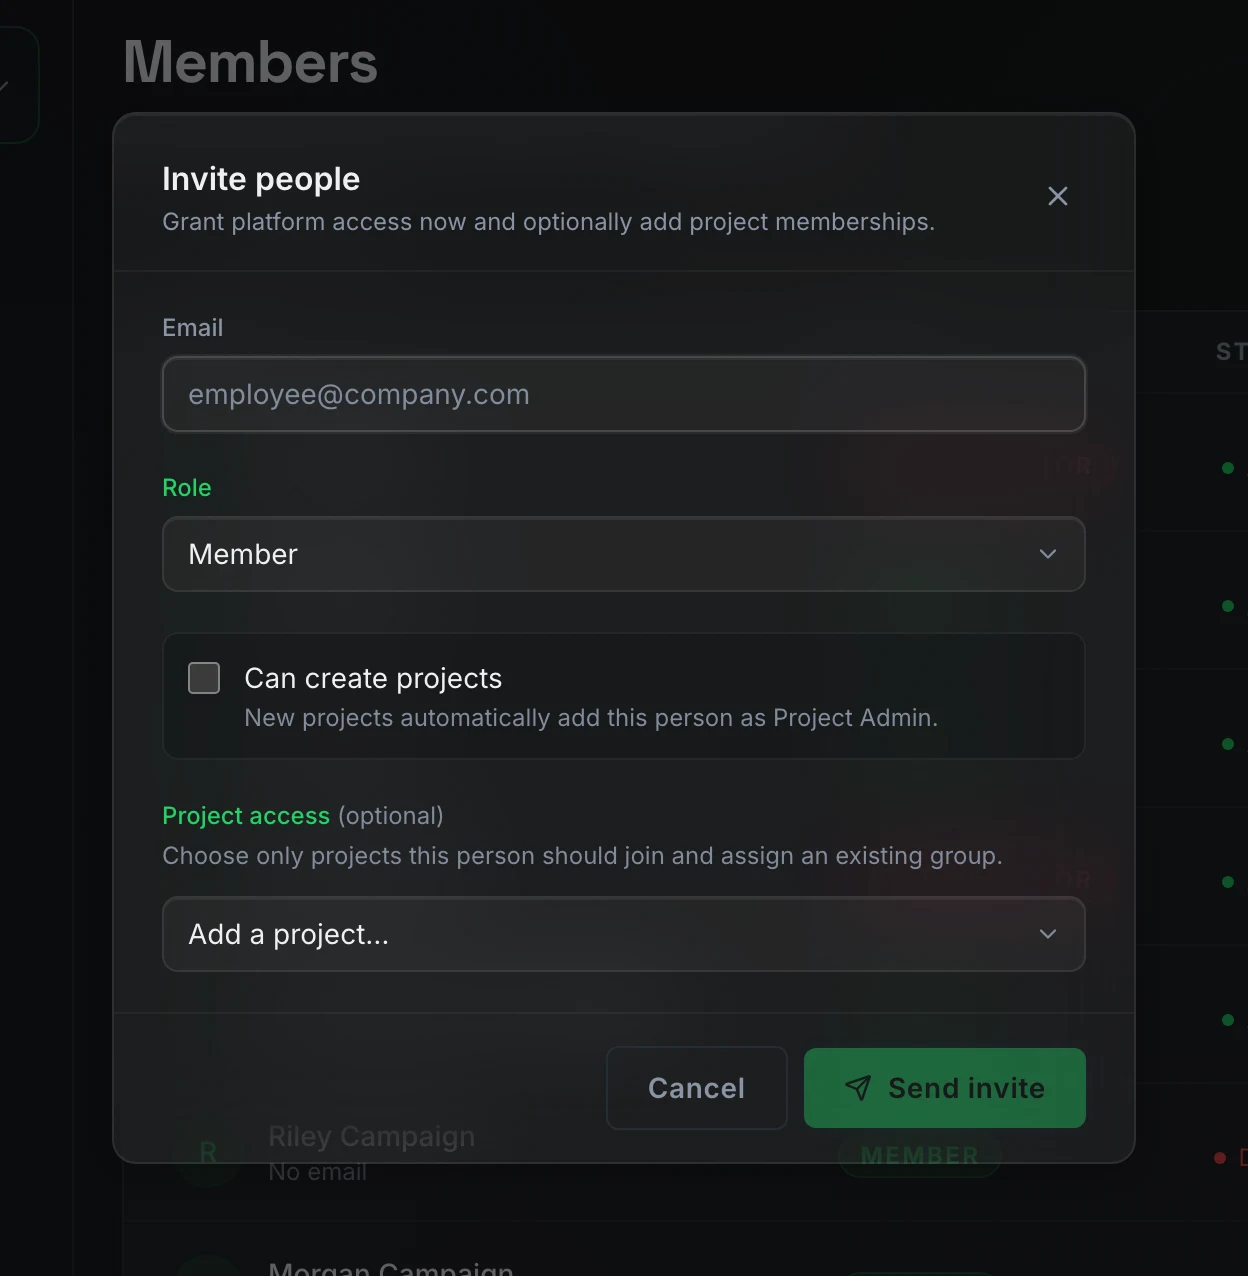
Self sign-up is off. The invitee receives a one-time link; the page behind it says You've been invited and waits for a click on Set your password before the link is redeemed, so a mail scanner that opens links cannot burn it. Until they sign in, the member row shows as pending with a Resend invitation action.
4. Turn on single sign-on
Optional. Settings → Identity & access → SSO configures Okta, Microsoft Entra ID, Google Workspace, Auth0, Keycloak, or a custom SAML 2.0 or OIDC provider, plus social login. The Enable SSO toggle stays off until one provider is configured. The tab is locked on plans without it; the lock's tooltip says so.
5. Create the first project
Sign in as one of the people you invited, or stay as the administrator, and follow Create a project. The first generation run will tell you quickly whether the provider and routing are right: open /projects/<project>/runs if a document does not appear.
Next steps
- Members, roles and SSO: groups, permissions, the invite flow in detail.
- AI providers and models: the Providers screen and every routing role.
- Gateway controls: token saving, guardrails, request tracing.
- Configuration and upgrades: auth, encryption key, external storage.