
Pipeline editor
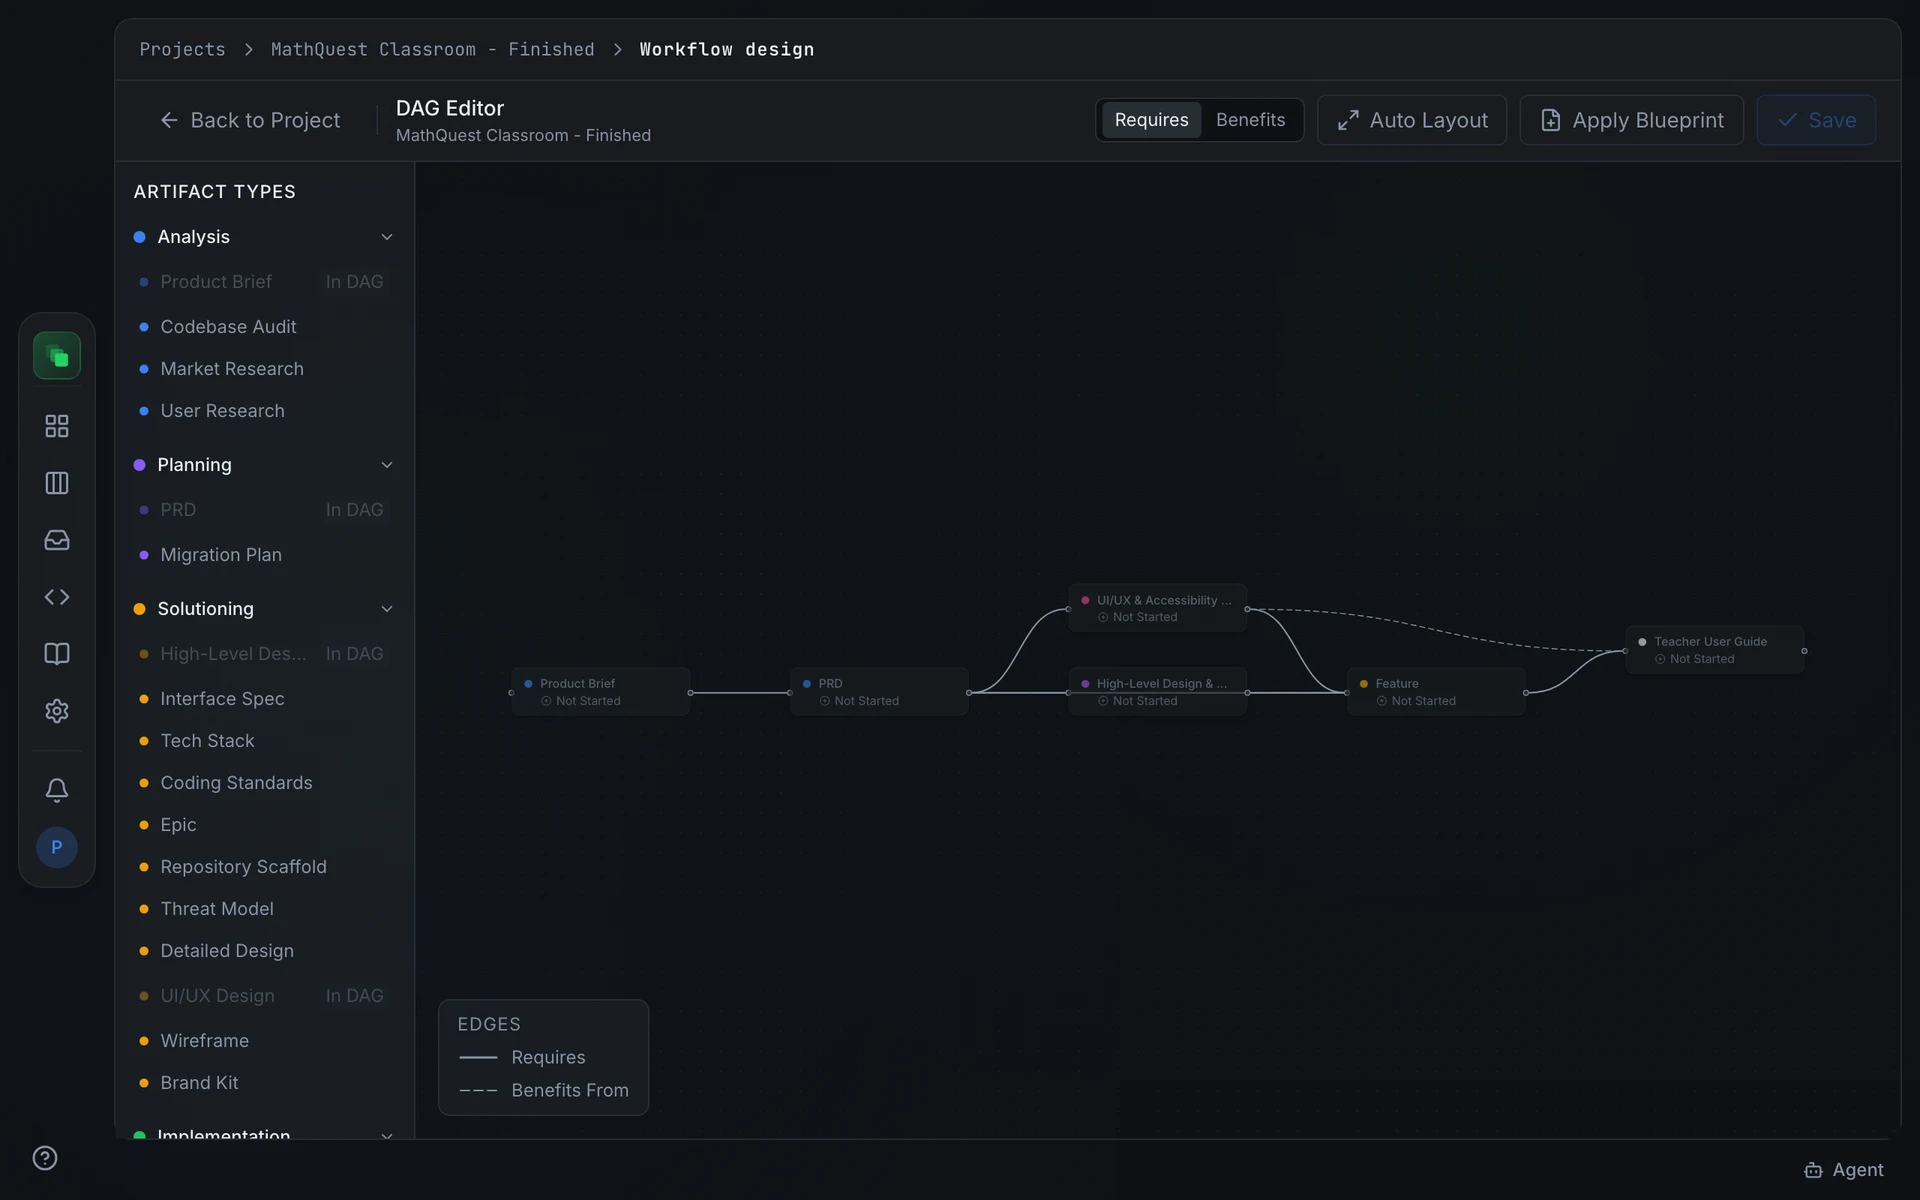
The pipeline editor is a DAG canvas at /projects/<project>/dag-editor where you define which artifact types generate and in what order. Each node on the canvas is an artifact type; each edge declares a dependency. The editor is not in the project sidebar. Navigate there directly from the URL or follow the link inside the workflow-design artifact.
How generation works
A node dispatches (starts a generation run) once every artifact listed under its requires edges has reached approved or locked. The run produces a draft; submitting that draft for review and getting it approved then unlocks the nodes that depend on it.
Some artifact types are configured as auto_approve: the generated artifact skips review and lands directly at approved, immediately unblocking any nodes that depend on it.
Artifact types with cardinality: 1:N fan out into a batch of sibling artifacts. Each sibling does not wait for a human to approve its upstream sibling; it dispatches as soon as the upstream sibling is settled, meaning in_review, approved, or locked. This lets a set of related artifacts generate in parallel.
The entire downstream pipeline is gated on the workflow-design artifact. Nothing generates until the workflow-design is locked.
Toolbar
Nothing on the canvas is persisted until you press Save. Validation errors surface at that point.
Canvas and palette
The palette on the left groups artifact types by phase: Analysis, Planning, Solutioning, Implementation, and Custom Node. Drag a type onto the canvas. An empty canvas displays the prompt: Drag artifact types from the palette / or use Apply Blueprint to start from a template.
Draw an edge between two nodes. With Requires selected in the toolbar the edge is a hard dependency; with Benefits it is an optional benefits_from dependency that does not block dispatch.
Apply Blueprint
Apply Blueprint opens a picker where you choose a template. Before replacing the canvas the modal warns: This will replace the current DAG. Unsaved changes will be lost. Save first if you want to keep what is there.
Node Config
Select any node to open the Node Config panel.
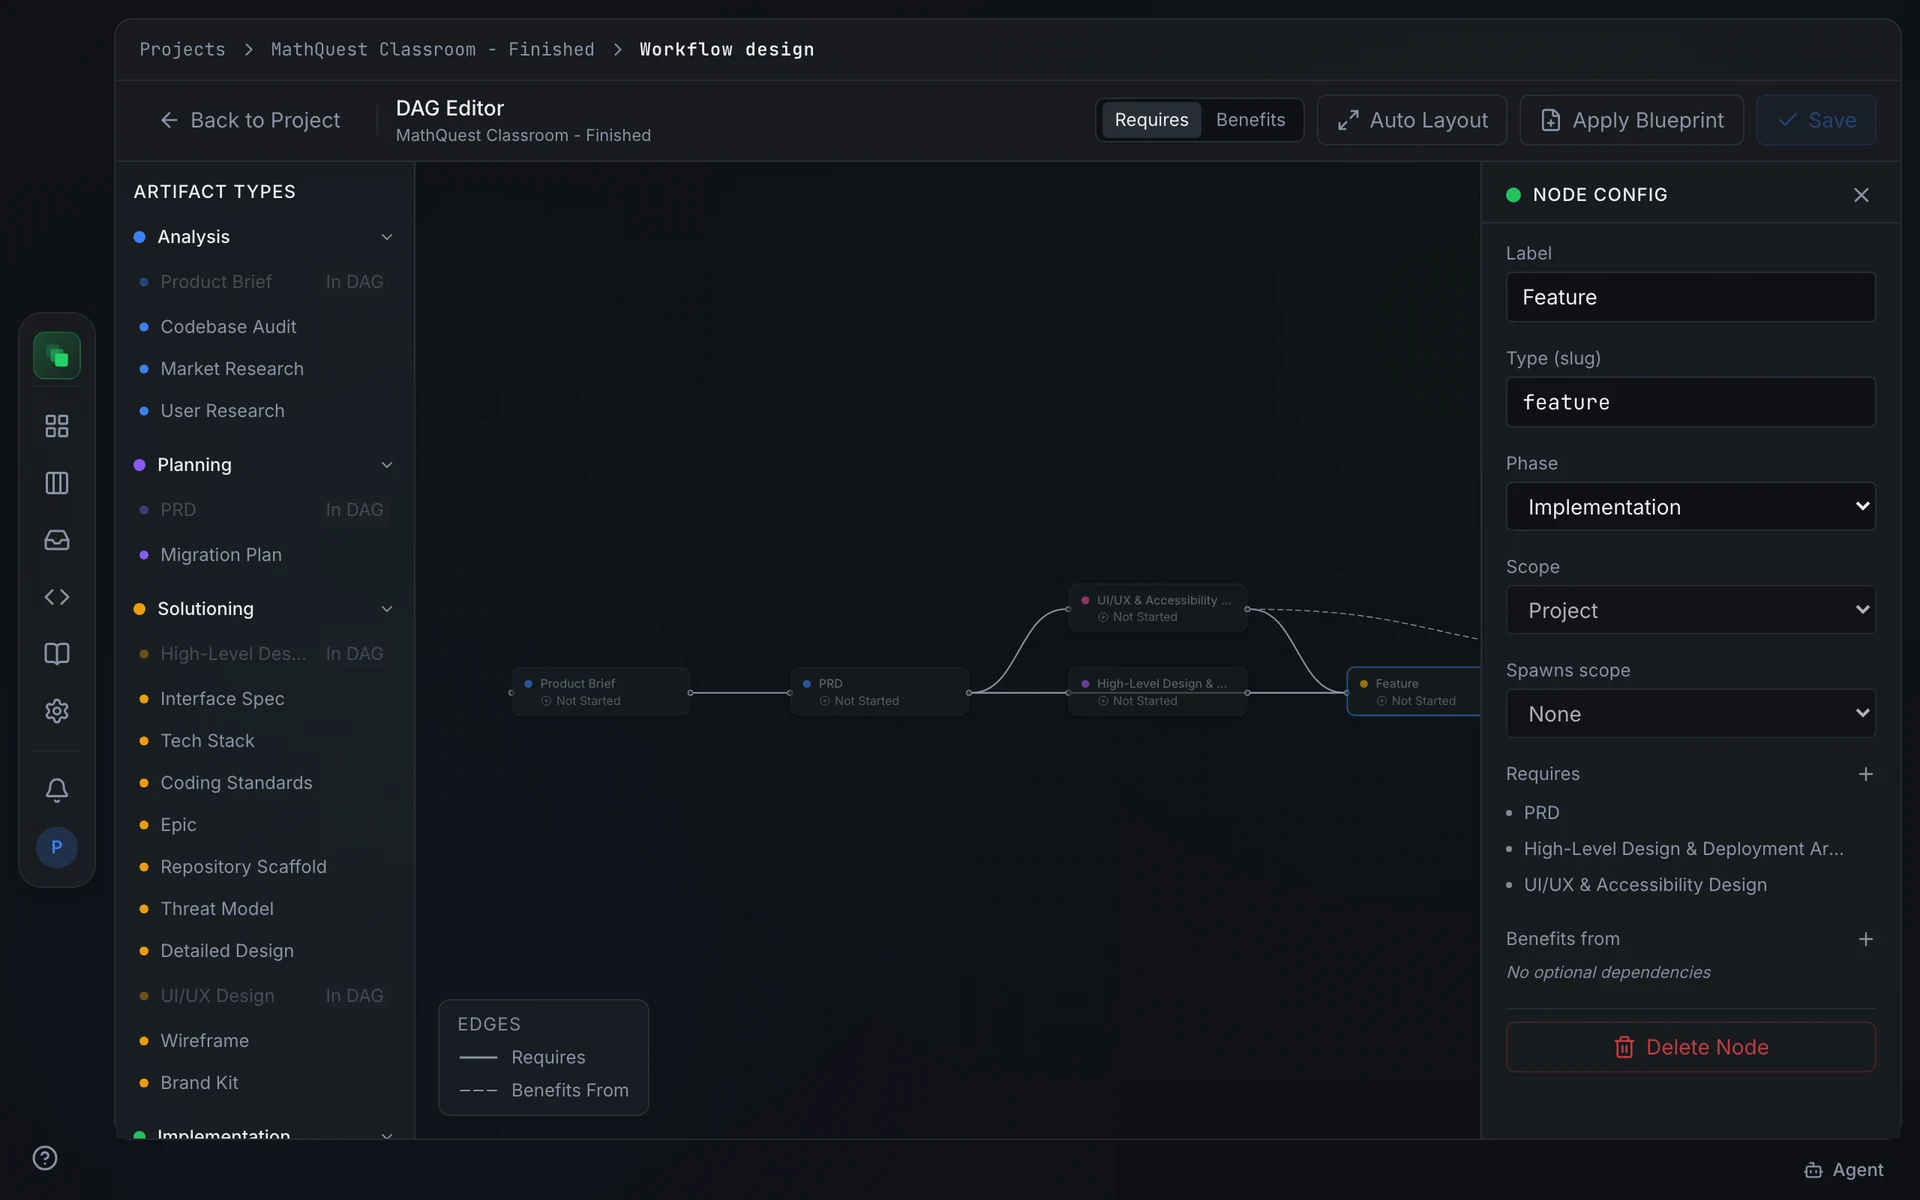
Scope and Spawns scope are read-only.